Lacuna Passage - Devlog #75 - Inventory Icons, Habitat Status, and More

I don't really have a good intro for this month, so... Inventory icons! They're pretty cool.

I've been staring at placeholder numbers on the inventory screen for so long, so it's actually really exciting to finally have some finished art in the UI. The above images show the current 25 completed icons, but we should have roughly 100 total items in the first Survival Sandbox release.

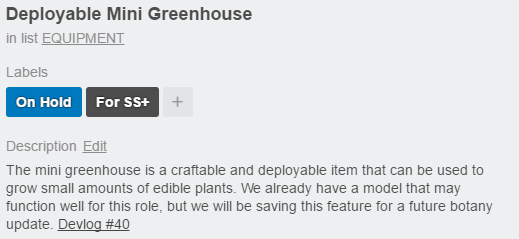
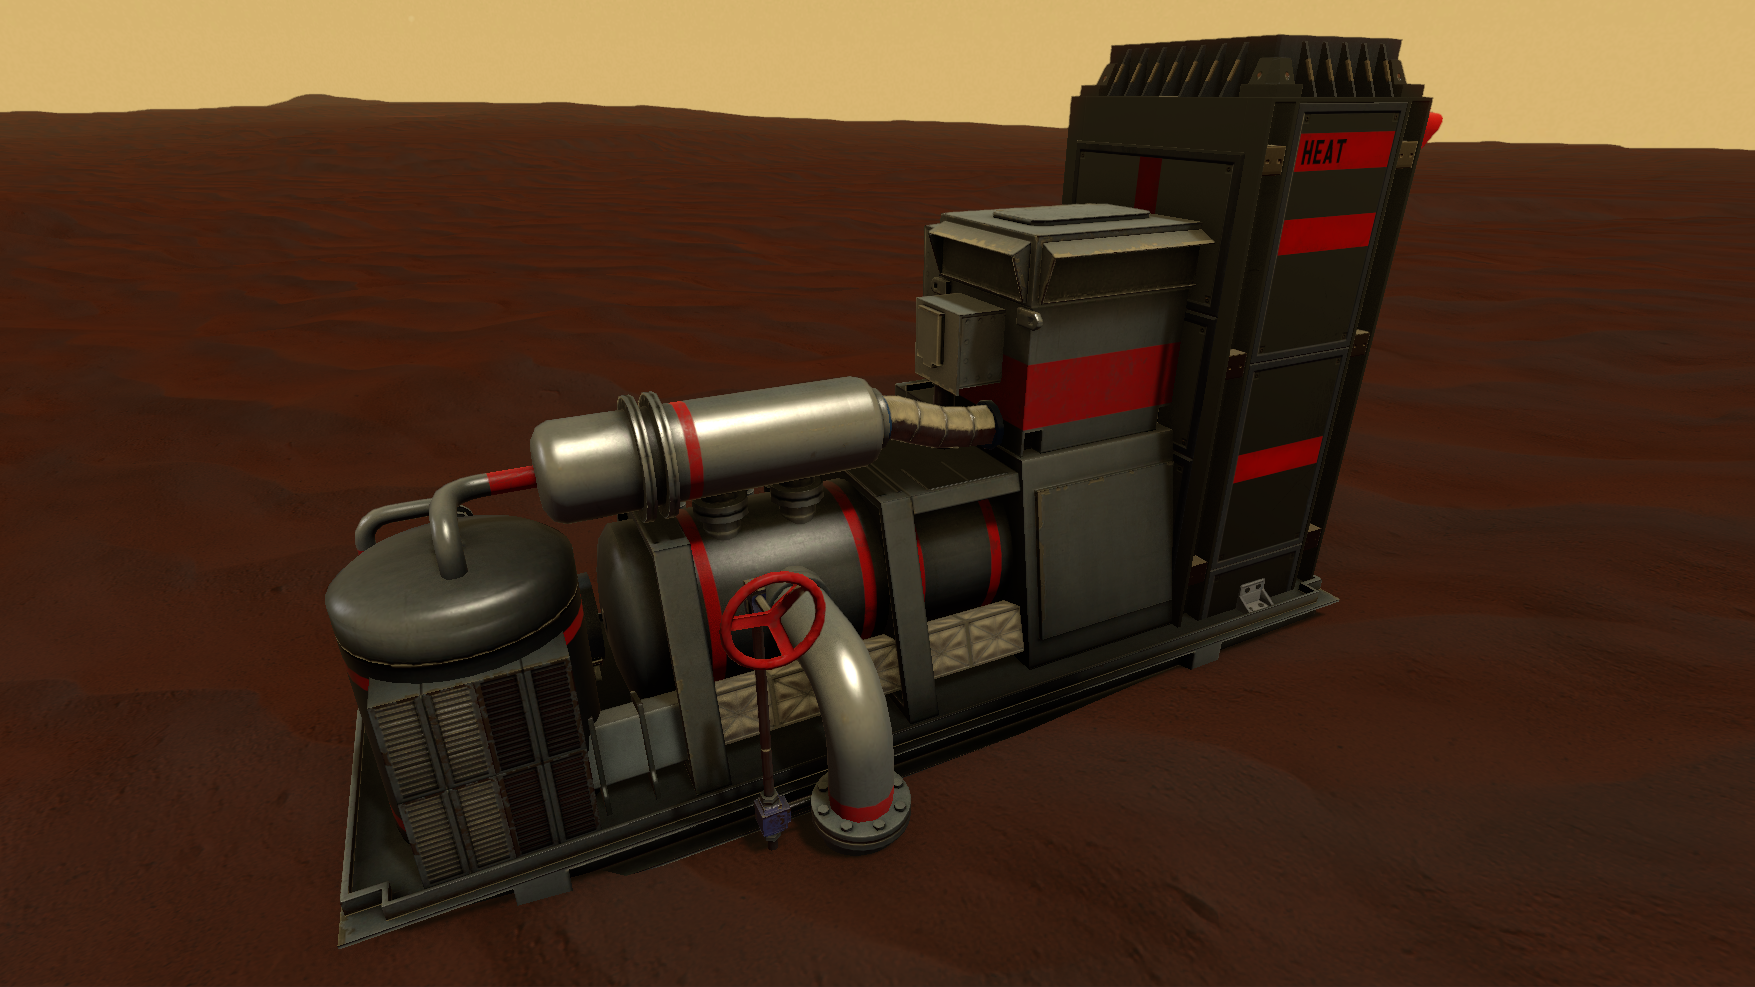
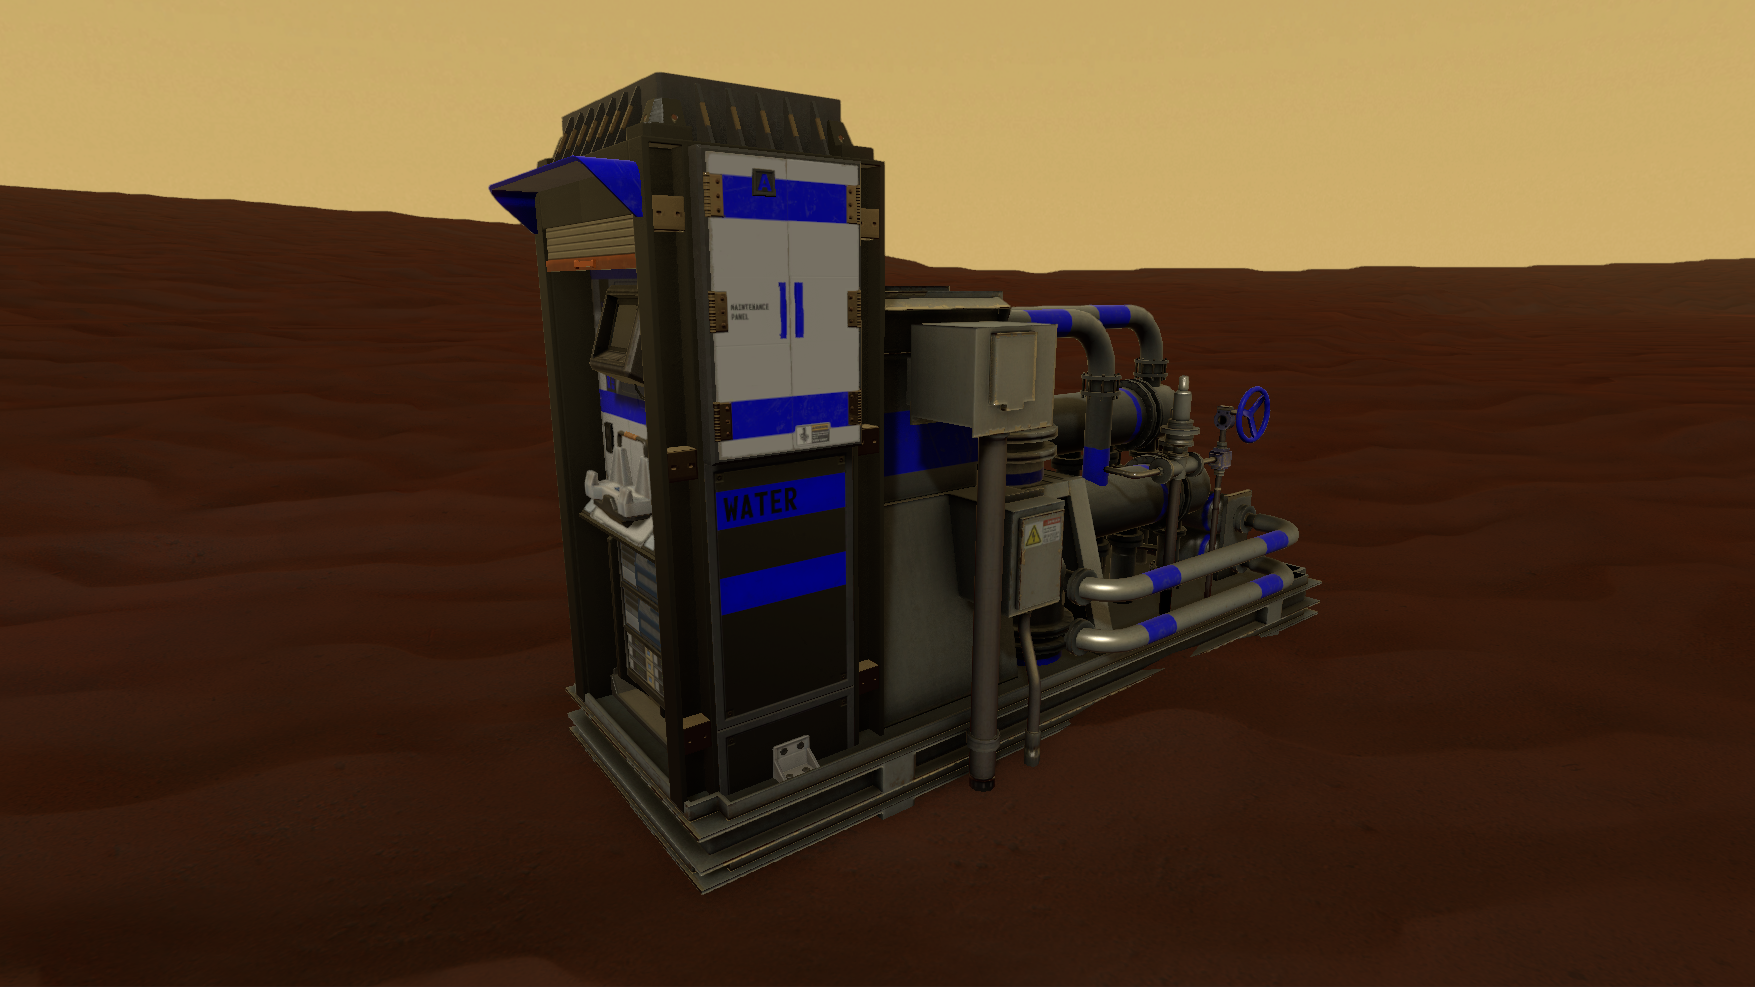
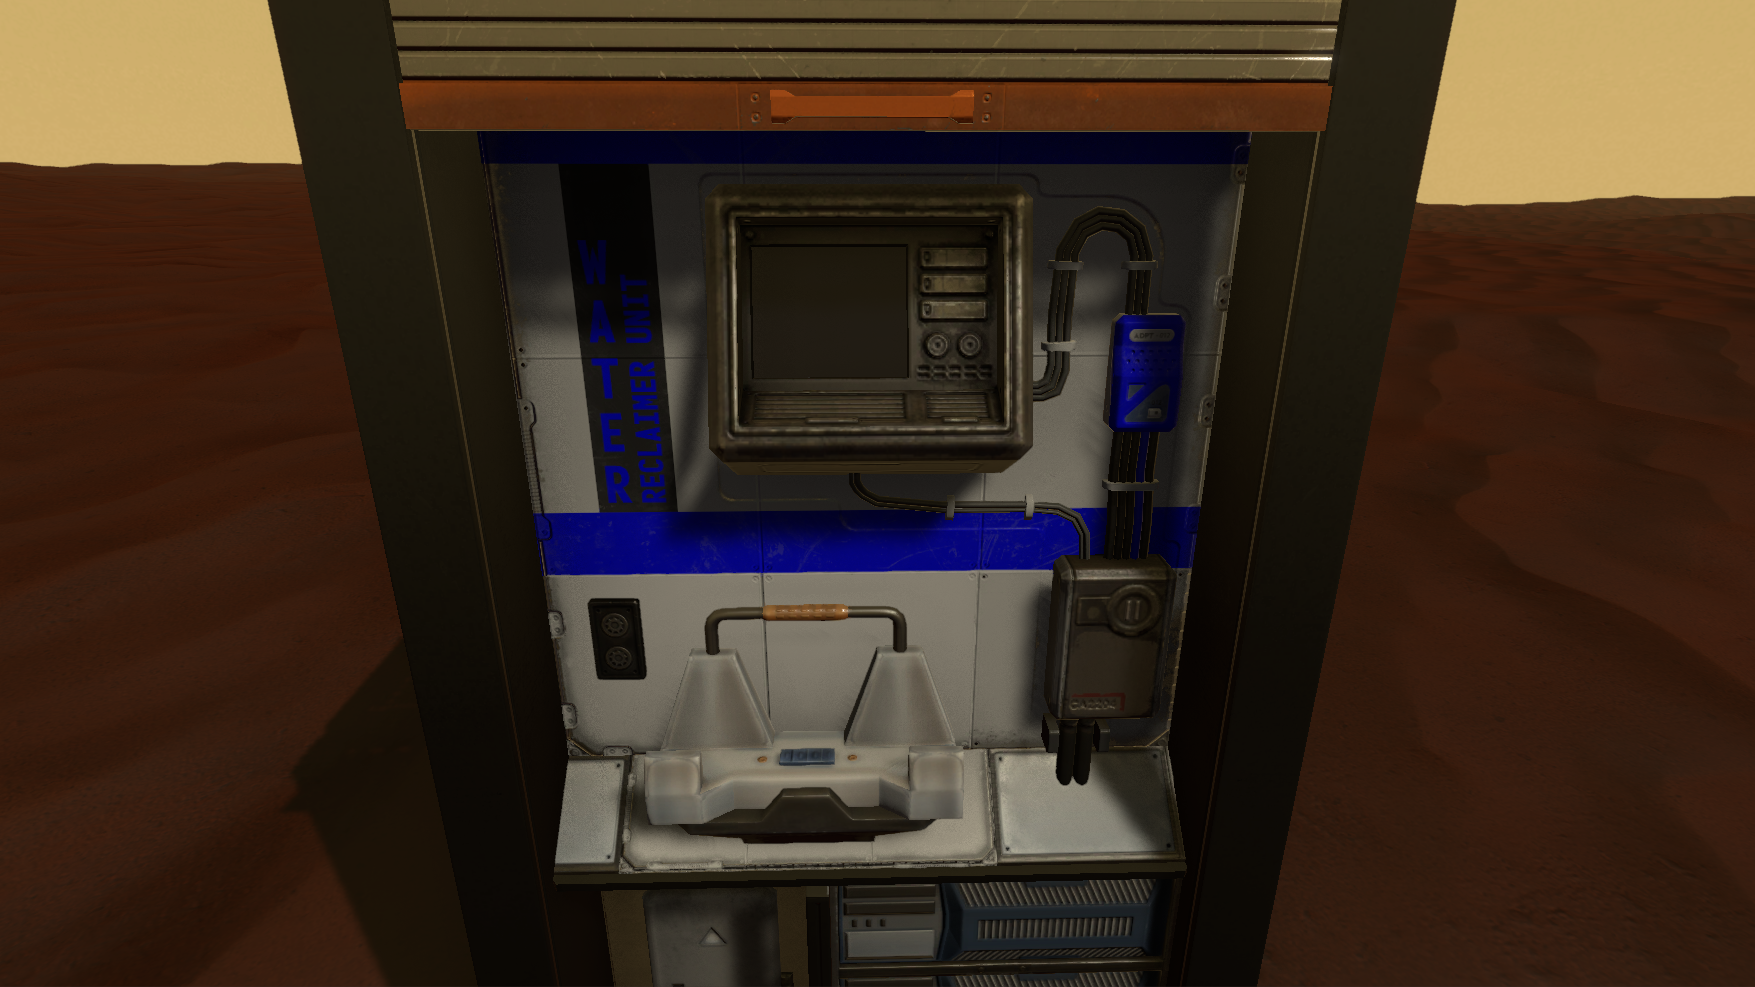
I've also been working on several more integrated features between our habitats and their attached exterior modules. A simple addition of a new habitat status console in the airlock will allow you to quickly check all of your life support systems at a glance.

This will help you to make a game plan before you decide to exit the habitat for an EVA. Keeping tabs on your oxygen, water reserves, power and heat status will be very important.

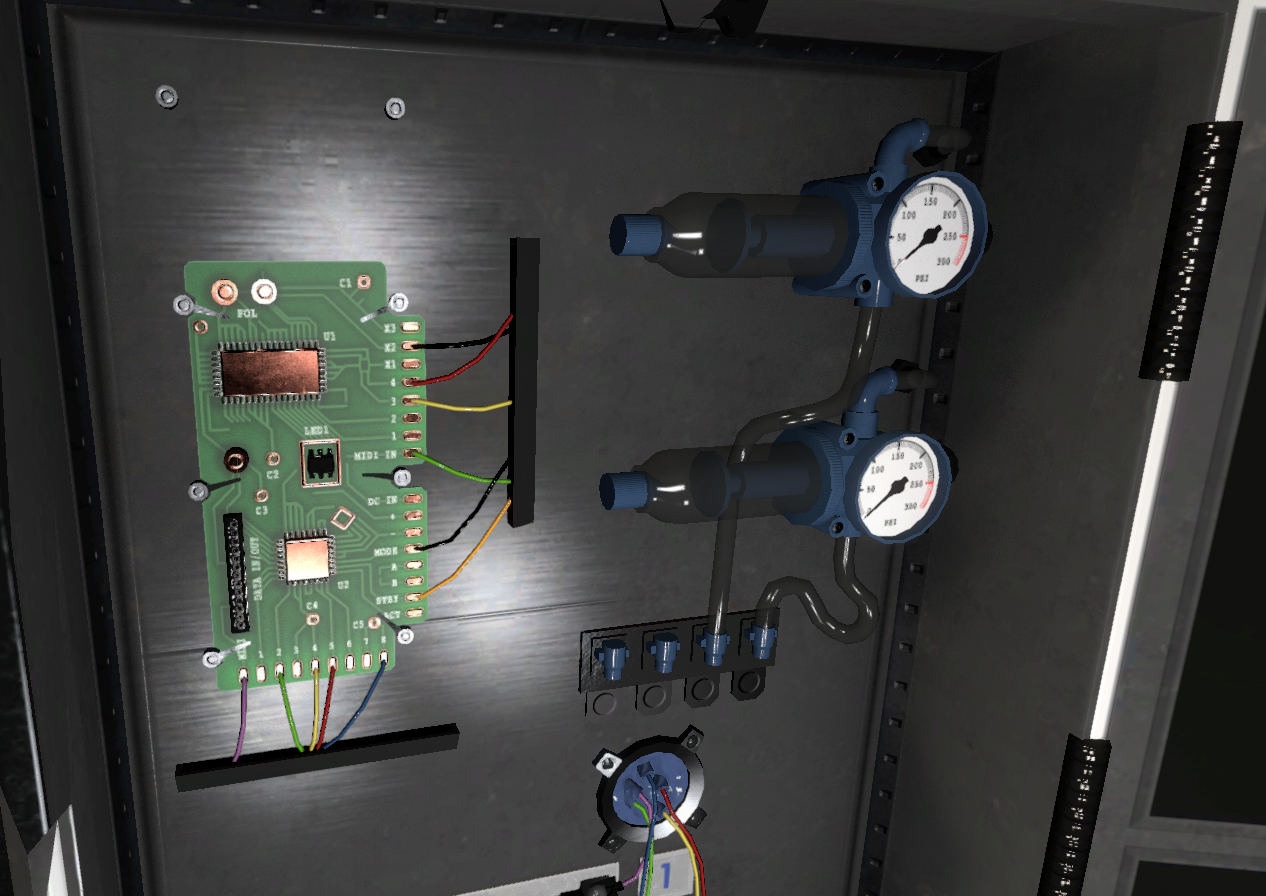
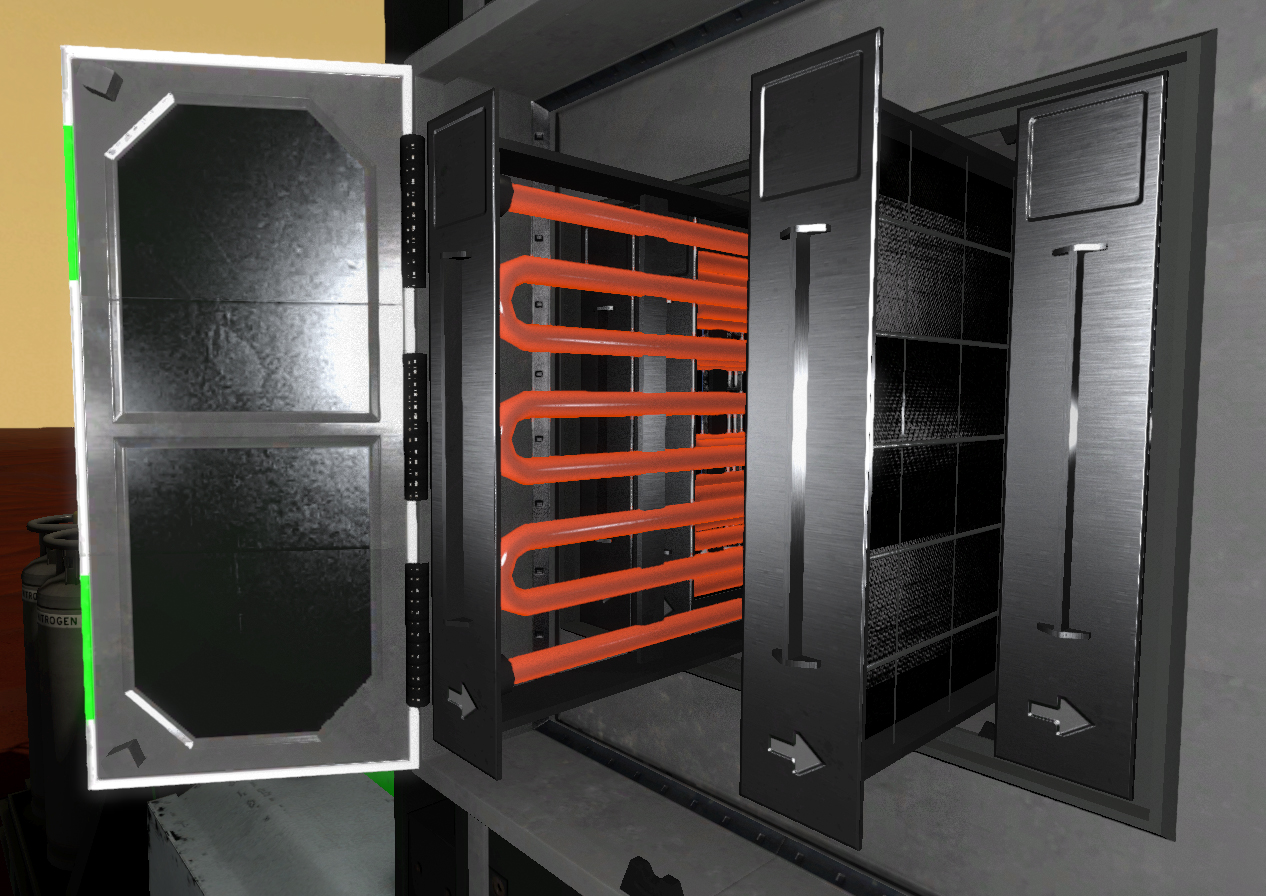
As you can see above, this is a habitat that was just recently brought back online. Power is on and your reserse suit battery is being charged. The airlock is currently depressurized, but the interior temp is quite low still since the heater was just turned on, so it's probably best to let it get up to a comfortable temperature before entering. Most importantly, your water reclaimer seems to be offline. In this scenario all of the modules have been turned on, but it seems like there must be a component failure in the water reclaimer preventing it from collecting water. Which would be bad enough on its own, but unfortunately the reoxygenator also requires water to produce oxygen and with the water reserves empty it can't do its job. So you can see how this screen will be very helpful in evaluating any issues that might arise. The next step for our astronaut in this case would be to go on an EVA with some carbon filters, hoses, fuses, and maybe a circuit board in order to repair any component failures in the water reclaimer.

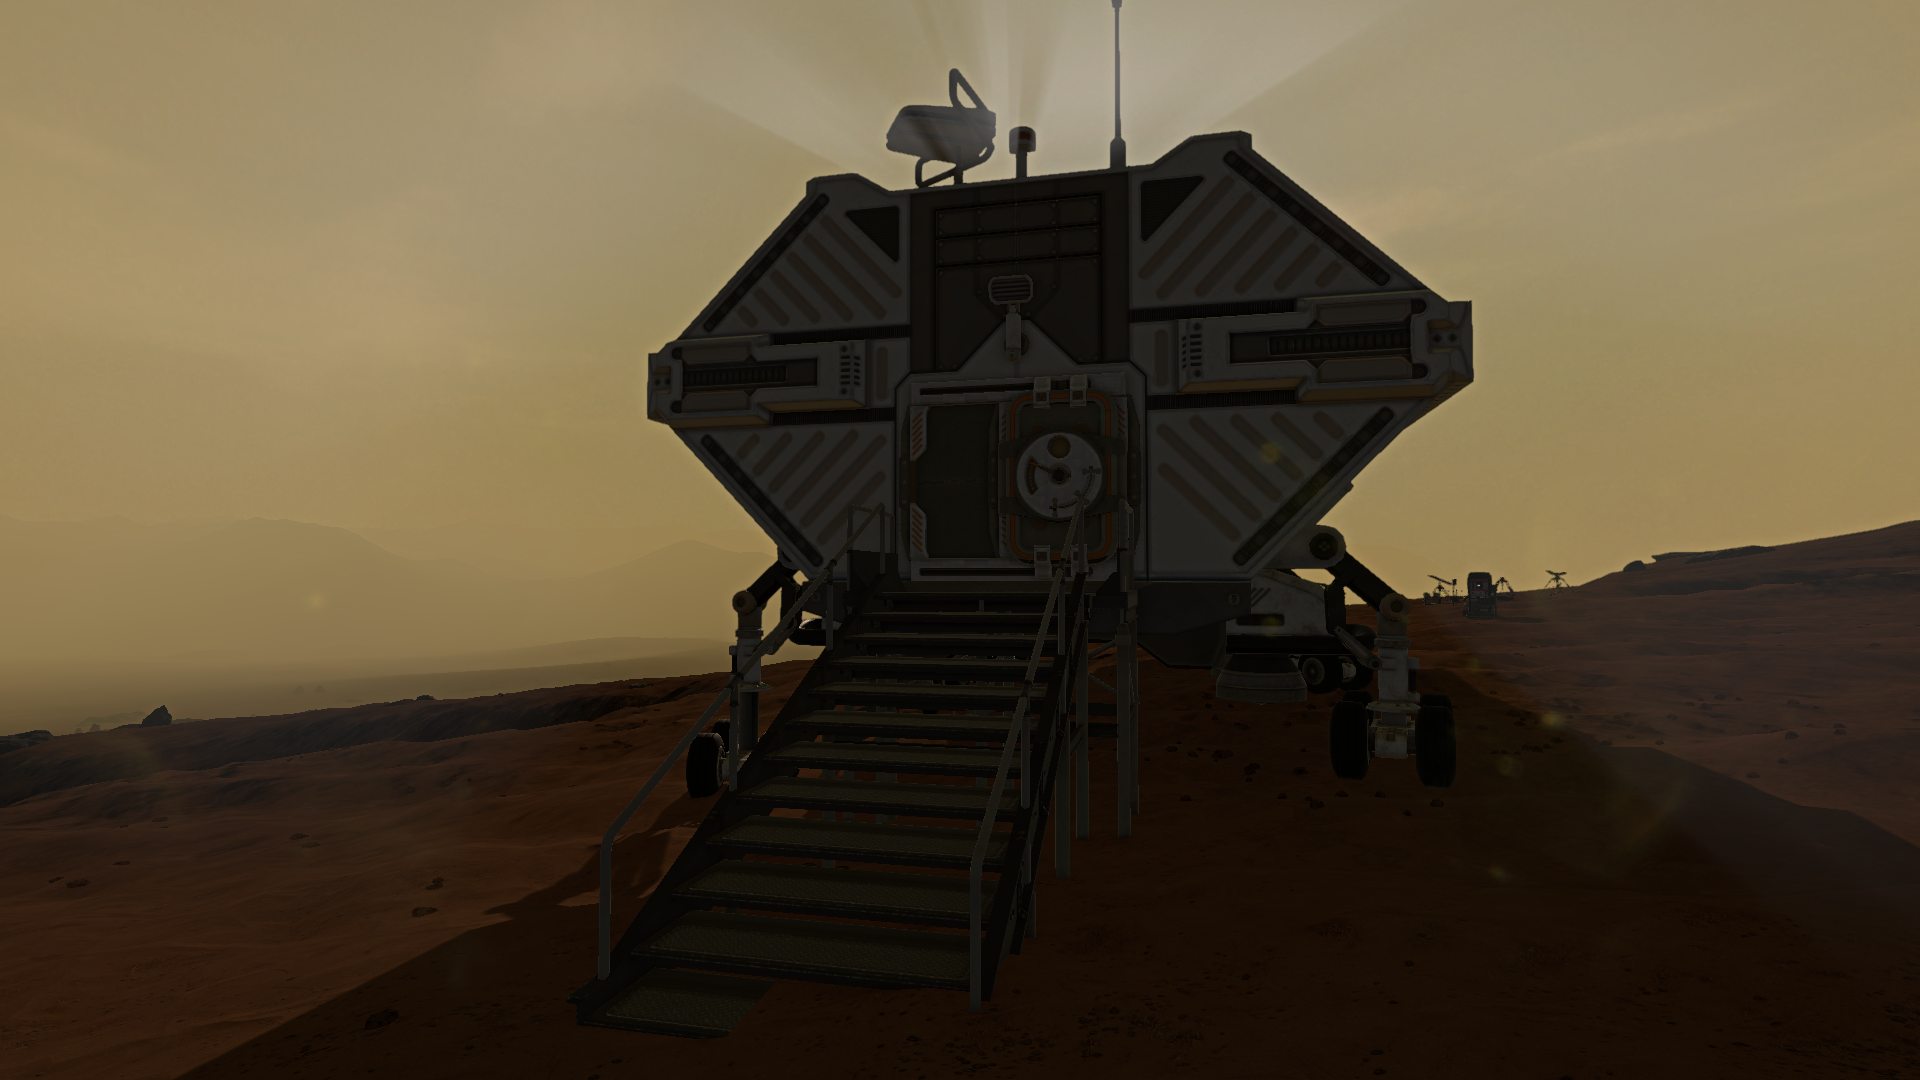
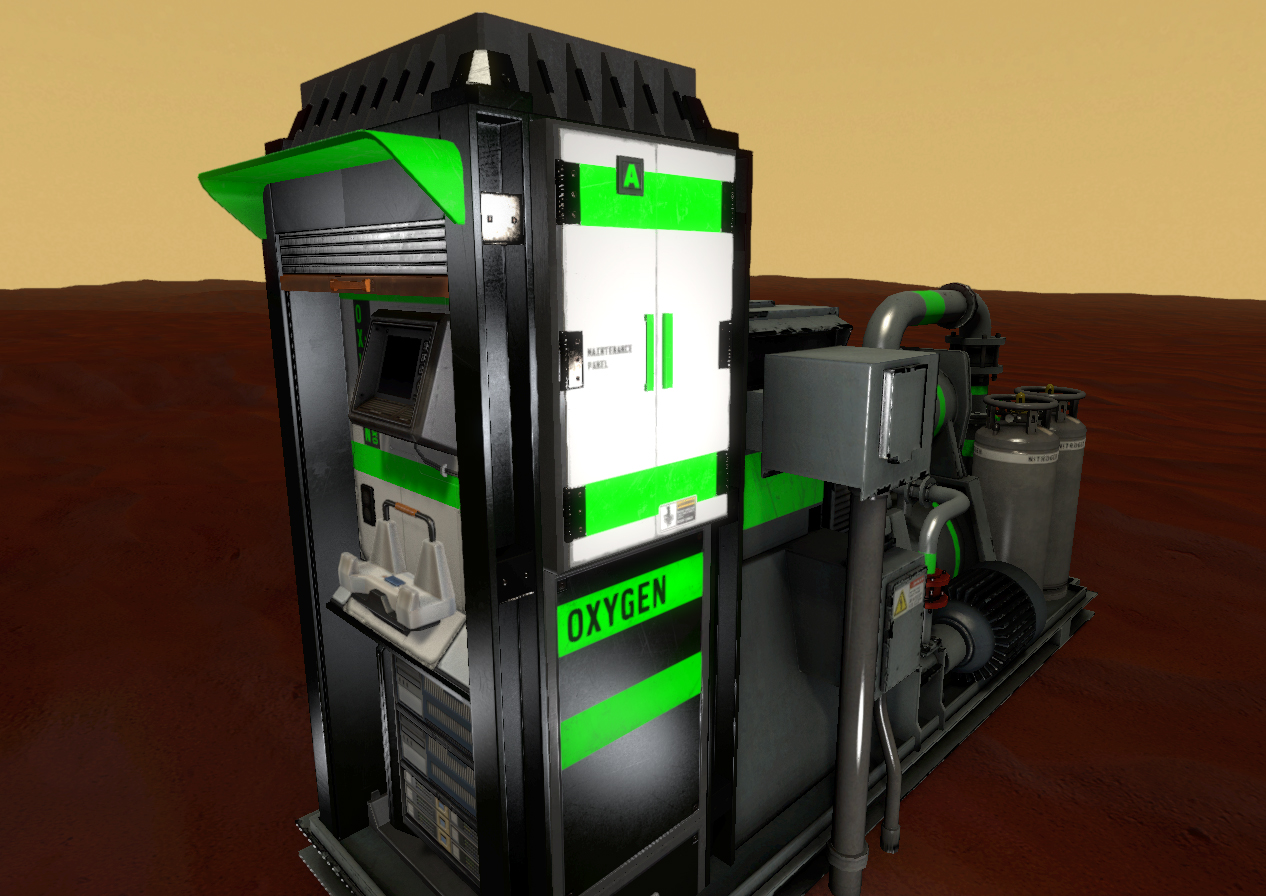
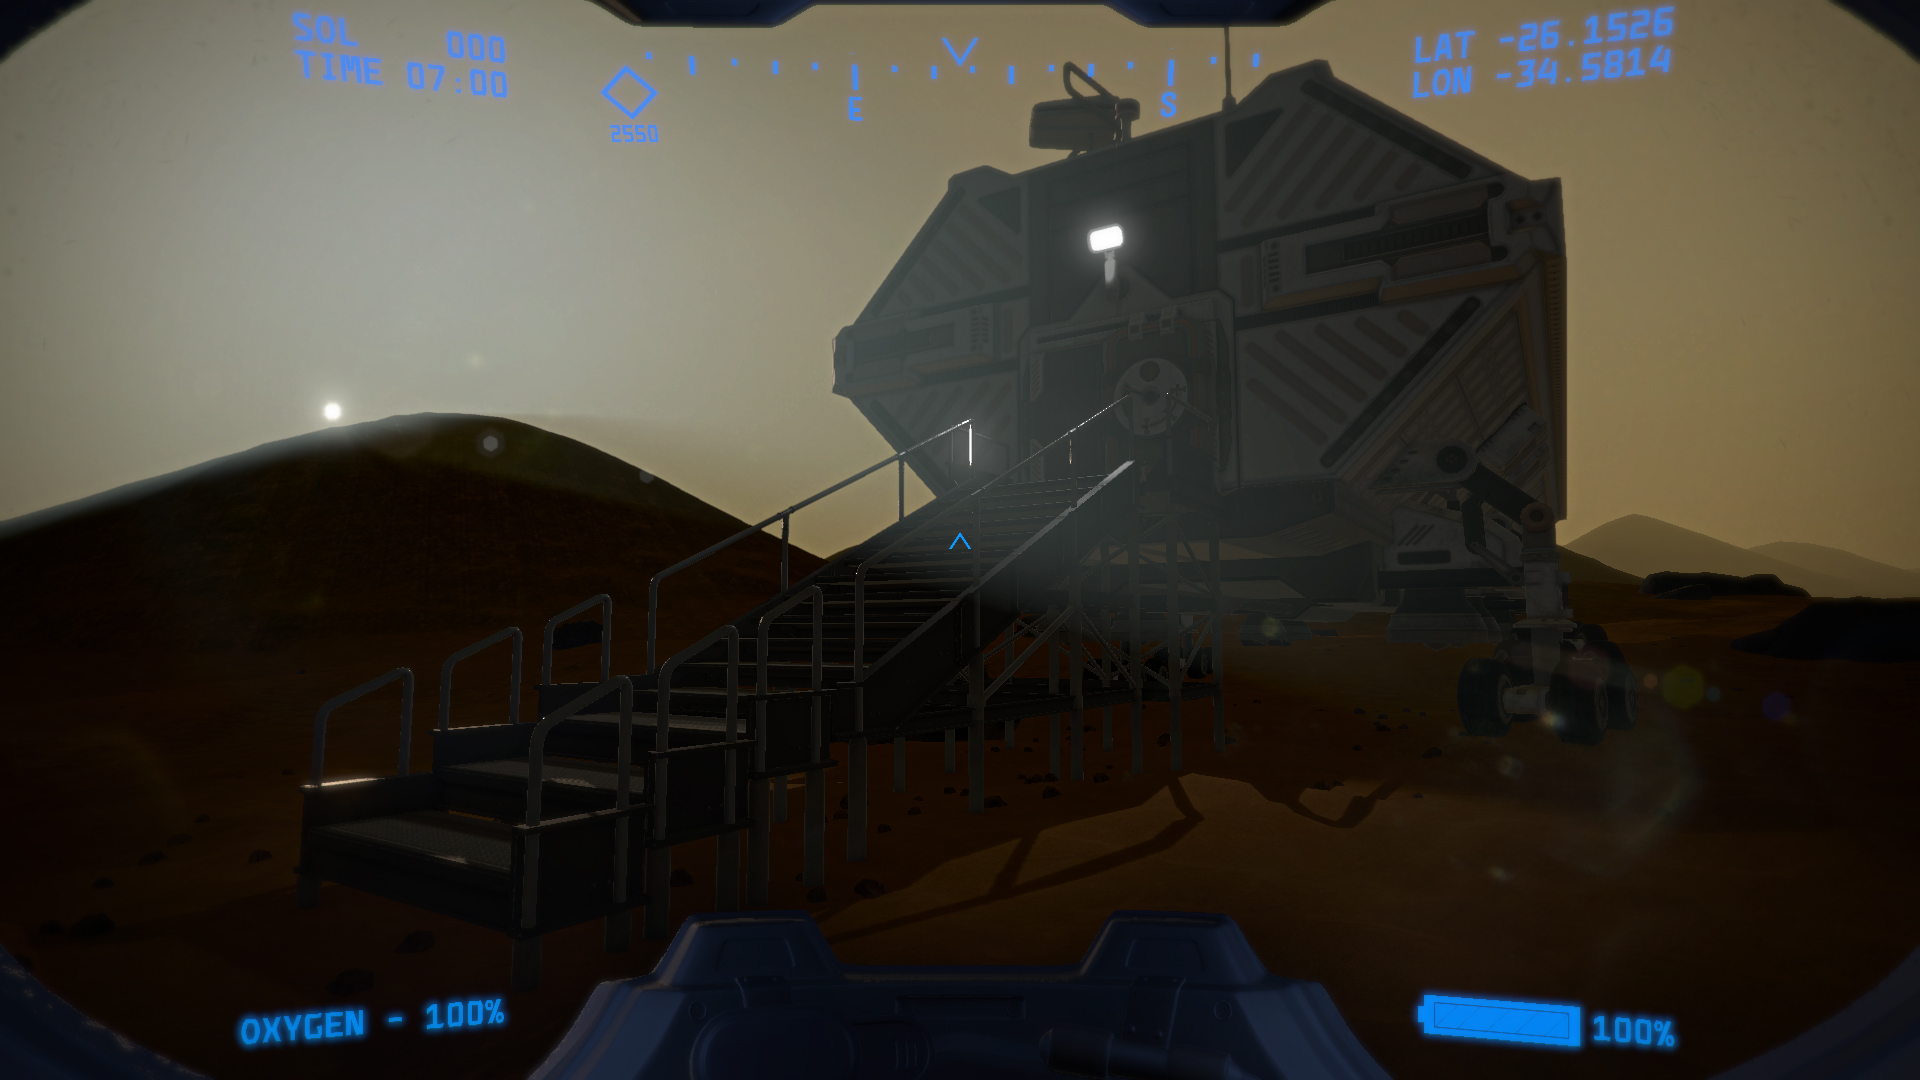
This kind of situation might be exactly what you face after finding your first habitat to take shelter in after starting a new Survival Sandbox playthrough. But before you get to your randomly selected starting habitat, you will spawn at a randomly selected landing site in an emergency landing pod. Eight of the 9 total habitats are possible starting habitats and each habitat currently has two possible landing sites which makes for a total of 16 possible starting positions for any one playthrough.

One of several possible emergency landing sites where you can start your playthrough...

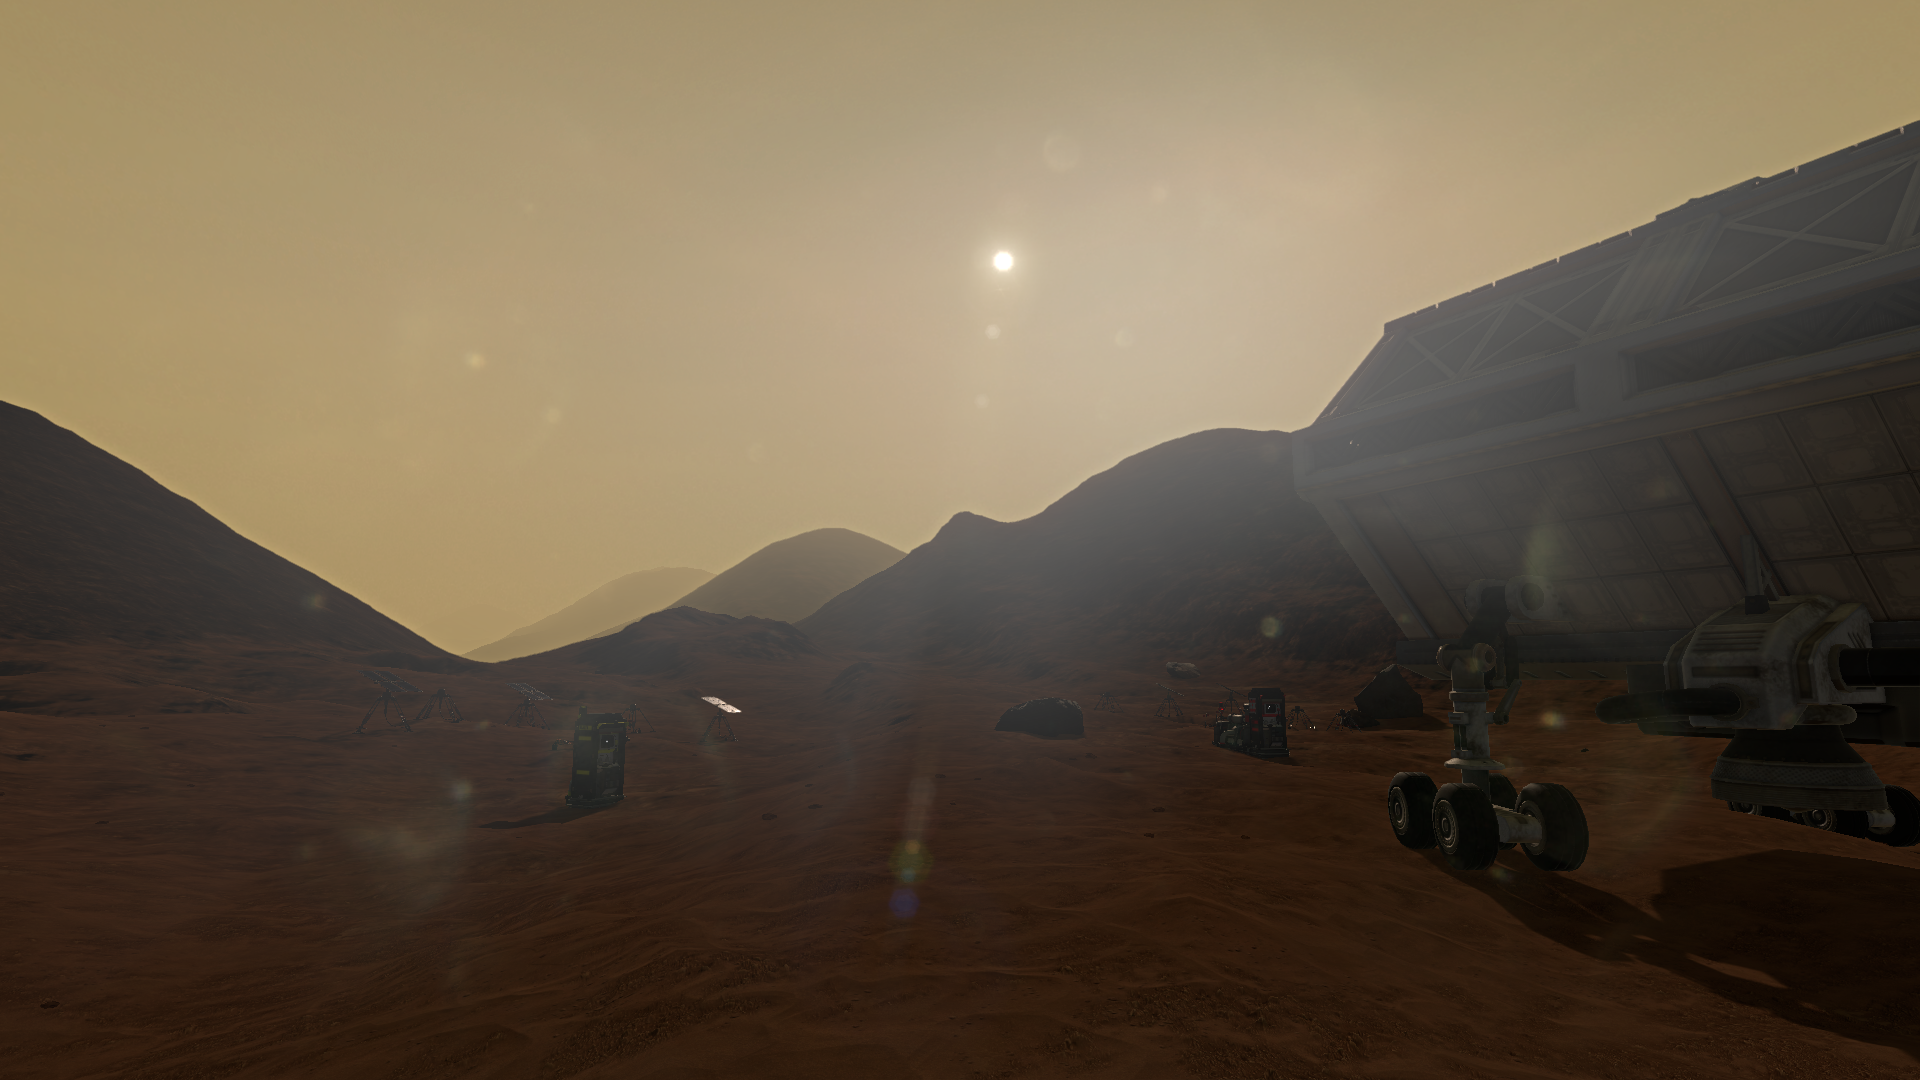
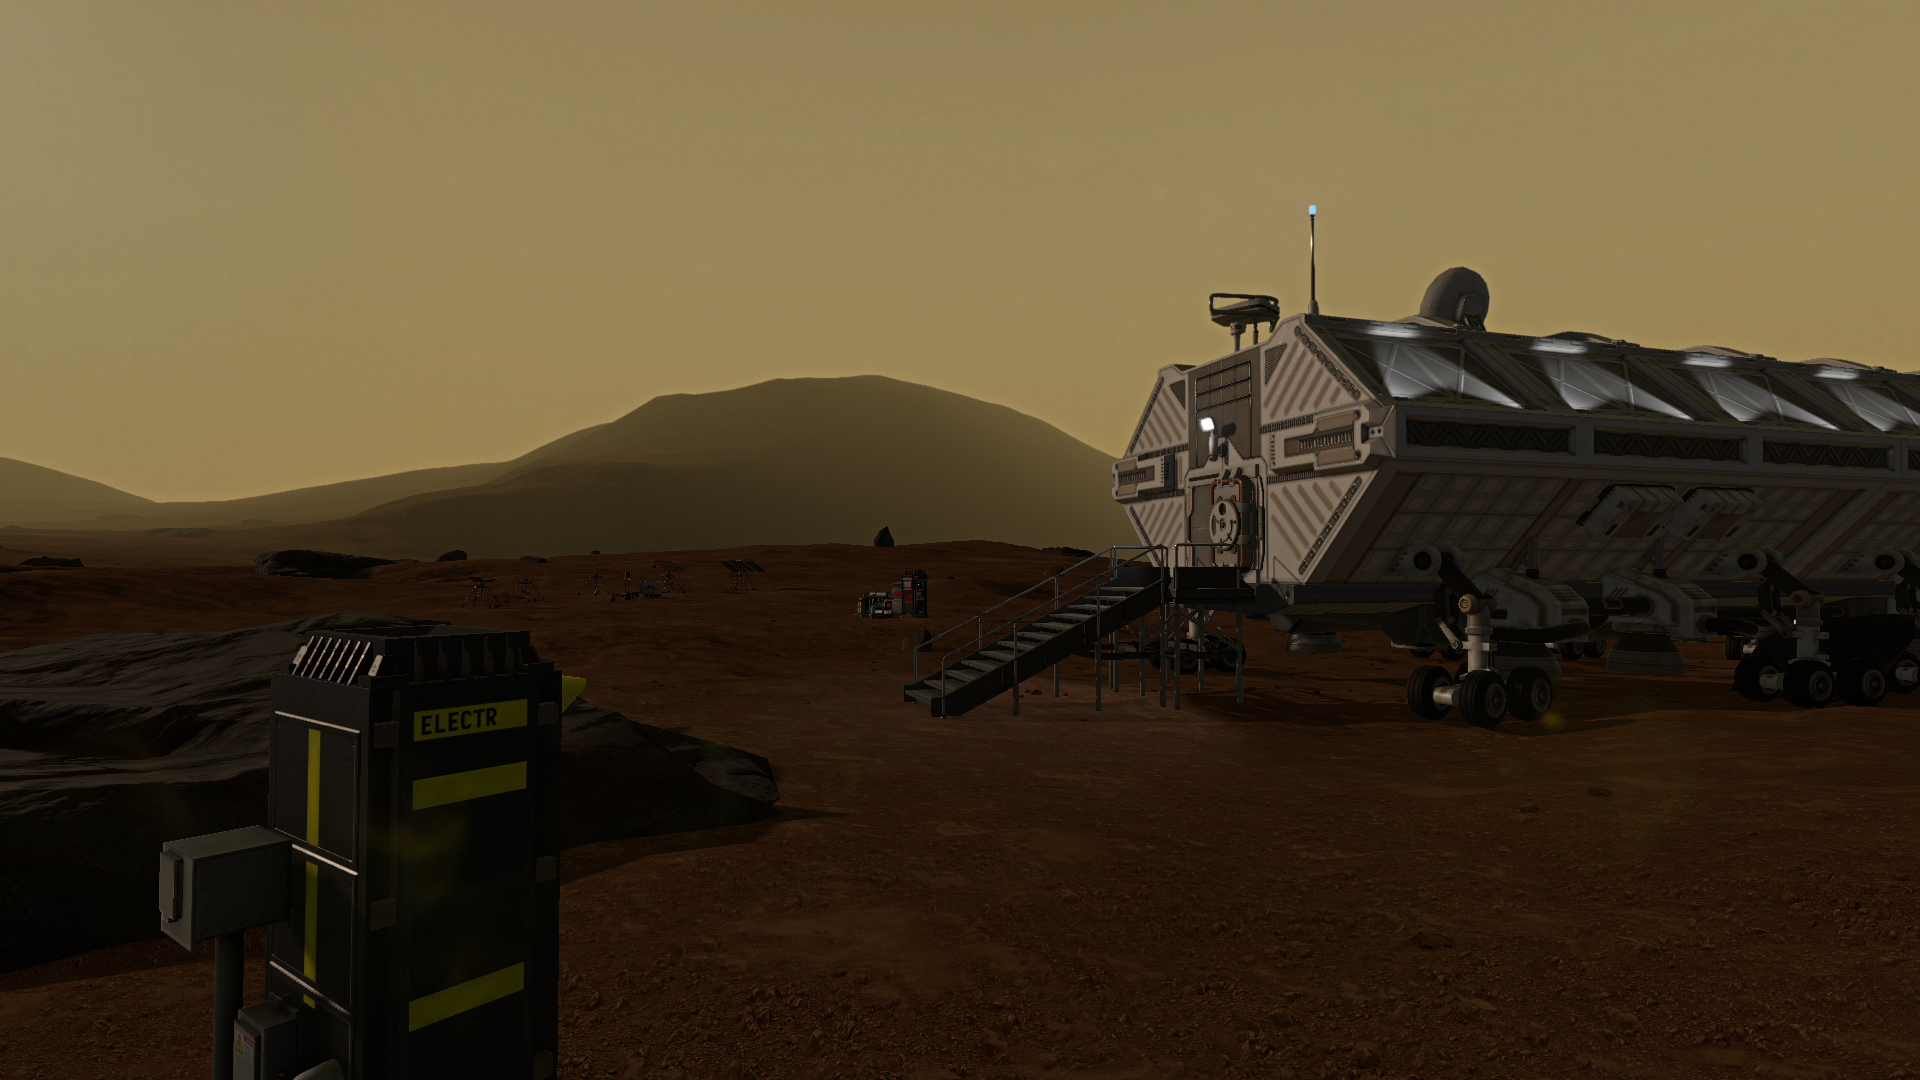
A while back I showed some of our new rock and cliff models that I will be using to spruce up the landscape a bit and I've been slowly adding many unique formations to the terrain. Below are a collection of screenshots showing the new level of terrain detail with these added models.

Alright, that's it for the devlog this month. There's more that has been completed, but not much that would be fascinating to share right now. So back to work!

Lacuna Passage - Devlog #74 - Gameplay Randomization and Release Window

This past month has been a lot of coding and very little asset creation. Which means that this month's update will not be that visually interesting, but it also means that we are getting to a very good spot with the development of the Survival Sandbox. And when I say we, what I really mean is I. I am the only full-time developer on the project right now and I handle a few other small contracted contributors. My brother Spencer who was working as our full-time art director has moved on to other employment since we have reached a point in development where a majority of the remaining work is not art related. He is still assisting with a few art tasks, but for the most part we are moving forward and looking ahead towards our release on Steam Early Access.

We have made mistakes in our development and hit unseen roadblocks that have set us back multiple times. We apologize to our followers and to our backers. Thankfully we are reaching the release horizon. A few months ago we put out a Development Roadmap that you can view to check our progress. But today we want to take that a step further by sharing our current release goals. Our hope is to have the Survival Sandbox released to our backers by the end of the year and available on Steam Early Access by April of 2017.

Since we are such a small team there is certainly a chance that something could come up that would prevent us from hitting our release goals, but I am doing everything in my power to deliver. No one wants you all to play the game more than I do. So, that being said, let's talk about what I've been working on to make that happen.

A huge part of the Survival Sandbox mode will be providing randomized gameplay so that players will have a highly replayable experience. In the past we have discussed some of these randomization details and this month I've finalized some of the time consuming aspects of the habitat randomization. I have just completed placing every solar panel mount, every habitat exterior module, every cabling flag, and every habitat support wheel. The status of every equipment component is now being randomized. Each of our nine habitat locations is now integrated fully into our randomization system. Only three of those nine will be spawned for any specific playthrough. Below is a collection of screenshots that highlight the variety of terrain that surrounds each of the nine possible spawn points.

I am also working on the randomization of all the elements you will discover on your journey. Like I mentioned last month, I won't be sharing a lot of details about these discoveries since we want there to be an element of surprise for players, but I will show just a simple look at the tools we are using to fill these locations with interesting items for you to manage in your inventory.

I won't get into the technical details, but you can see how we are working within randomization constraints to provide a compelling replayable experience. In the coming weeks we will be randomizing the interior of the habitats and filling in all the various discovery locations with interesting things to find.

Ultimately our goal is to provide a game that let's you experience a view of Mars that comes as close as it might feel for our first planetary explorers. And we really can't wait until you all get a chance to play it. Thanks for hanging with us.

Lacuna Passage - Devlog #73 - WayStat Navigation and Weather Monitoring

Waypoint Stations (WayStats for short) are crucial science installations that will assist you with your navigation and weather monitoring. In the survival sandbox mode you will need to discover these WayStats and activate them before they're data can be accessed.

If there are no active WayStats within a certain radius of your location your suit's navigation functions will be offline. As you can see in the images above we have discovered a WayStat, but the HUD at the top shows our navigation is offline. To fix this we must first turn it on.

With navigation features back online we can now see our custom objective marker heading on our HUD compass and our own location in the navigation app on the datapad.

The weather monitoring functions however will require a small upgrade to the WayStat's components. If we try to access the new weather app on our datapad right now we will get a "NA" label at the location of the WayStat.

So you must access the component panel of the WayStat and install a new fuse.

Now when we access the weather app we will get a percent value that represents the visibility at the location of the WayStat. A 100% value means that there is no sign of a dust storm near the WayStat.

A single active weather monitoring WayStat will allow you to check your weather app to see if visibility is reduced, but you will need three active weather monitoring WayStats in order to get advanced warnings for incoming dust storms.

Related to navigation, we have also added a new gameplay purpose for photography. Some game discoveries like WayStats and habitats will have permanent map markers, but others like small supply caches will not. In order to catalogue your discoveries you will need to take photos of them (and perhaps save them to your favorite photos folder). Then you can access them in the photo app and use the "Set Custom Objective" feature to find your way back to their location.

And as you can see in the above gif, we are starting to fill in our landscape with these discoverable locations. 92 semi-randomized locations to be exact. We've only just really gotten started, but here's a closer look at one of the smaller supply cache locations.

As we work towards filling in our survival sandbox with interesting locations to explore we will probably keep most of them a secret so that finding them for the first time will feel like a genuine discovery.


And finally we want to show you how the terrain will improve as we continue to place more unique rock structures. The comparison below shows you the bare terrain from our NASA satellite data and what it looks like after we have manually placed more detailed rock formations.

That covers everything from this last month of development. Thanks for reading and make sure to let us know what you think in the comments.

Lacuna Passage - Devlog #71 - Exterior Module Components and Output

We have put a lot of work into the exterior modules this last month. So let's cover each one and how they will impact your life support systems in the habitats.

The Water Reclaimer and Reoxygenator Modules

The water reclaimer and reoxygenator are very closely related. Both require many of the same components to function and their output is connected.

Here you can see the circuit board, pressure pump hoses, and just below that are the fuses.

As with all components in the exterior modules they have the potential to fail. Above you can see an obviously broken fuse. Broken components can be replaced, but the slot it's in will need to be repaired as well. If a diagnostic had been done on the above module the slot damage could have been identified and repaired before the component failed. Unfortunately now the fuse is lost.

Every broken component has a visual identifier. Above you can see how the hose on pump number two has lost pressure and is no longer pumping.

Carbon filters are important for both the reoxygenator and the water reclaimer. Above you can see a broken filter, a functional filter, and a third empty slot. Not all slots must be filled with working components. Some can be inserted purely as a backup in case another slot fails.

If all components of the water reclaimer are functional it will slowly produce water from the soil which can be accessed as a resource in the habitat storage under the "Consumeables" category.

I mentioned that the reoxygenator and the water reclaimer are tied, and that is because you can't produce oxygen on Mars without H2O. If the reoxygenator is functional it splits the H2O from the water reclaimer and extracts the oxygen.

Above you will see the tanks that can store water and oxygen. Each module has their own tanks. However, if the water reclaimer breaks then the water remaining in the tanks will be slowly depleted to produce oxygen. Of course if you have multiple oxygen tanks you could always turn off the reoxygenator to preserve your water supply. Or perhaps if you have multiple water tanks installed then you will have plenty to spare. Of course, new storage tanks can be crafted... so long as the hab has power.

The Electrical Module

The electrical module only covers the interior and exterior lighting in the hab, power to the crafting bench, and the recharging capabilities for your suit battery. Each module has its own power supply (solar panels or RTG) for their own respective functions. All doors can be manually operated so you will never be locked out even with no power to the electrical module.

Above you can see how the exterior lighting is affected without power, which might be a navigational hinderance if you are trying to find your way back to the hab at night.

Inside you can still rely on your flashlight to get around and access your storage or sleep in a bunk. If you're afraid of the dark you could always salvage some components from other modules to keep the lights on and then move them back when you don't need to be inside.

One unique component of the electrical module is the simple electrical wire which you can see in the image above.

And last but not least...

The Heater Module

The heater's one unique component is the heating element. Above you can see that they are positioned similar to the carbon filters on the water reclaimer and the reoxygenator.

If too many heating elements are damaged or missing then you will definitely start to feel the chill inside the habitat. The interior temperature will slowly decrease over time to match the freezing Mars temperatures outside the hab. Although, as long the electrical module has power you can keep your suit battery recharged and stay warm inside your suit.

As you can see, the exterior habitat modules are a vital part of your life support system in Lacuna Passage. Your suit may be your first line of defense during an EVA, but the habitats are an oasis in the vast Mars desert where you can plan your next move. You must keep a constant inventory of all the required components so that none of these important systems breaks down at an inopportune moment.

TIMEframe Currently on Sale!

In other news, our game TIMEframe is coming up on its one year anniversary of release and is currently on sale for 50% off in the Steam Summer Sale! If you haven't had a chance to check it out yet, now is a great time. If you already received your free copy as a Lacuna Passage backer, consider picking up a gift copy for a friend. And please leave a review!

Hope you all have a wonderful 4th of July here in the states and thanks for reading!

Lacuna Passage - Devlog #70 - Exterior Modules and Development Roadmap

First and foremost, let's go over some of the development progress since our last update. Lately it has been easier to share what we've been working on in video form, so check the video below to see our progress on the habitat exterior modules.

That's all well and good, but now we would like to share something with you that we probably should have done a while ago.

We are officially launching a publicly visible development roadmap.

Since we are such a small team, a lot of our development planning happens across lots of different mediums (Google docs, Trello, email, Skype, etc). I had been using that semi-disorganization as an excuse to keep our overall progress hidden, thinking that our devlog posts were enough to keep our backers and followers happy. Thanks to feedback from a few very honest backers I have finally decided to prioritize a more presentable public roadmap.

We have been using a progress tracker called Trello for quite some time now, but various aspects of the game have been split among several different private boards and we haven't done a good job of maintaining a consistent approach to documenting each feature or piece of art. So to rectify that I have recently been working to consolidate the major elements of the Survival Sandbox into a single Trello board where you can view tons of information.

Lacuna Passage Survival Sandbox Development Roadmap

The link above will take you to our public board where you can explore all the features we have planned for Survival Sandbox v1.0 and beyond. We are still planning for the Story Mode as well, but none of that will be covered in the Trello board in order to avoid future spoilers.

If you are not familiar with Trello you will see that we have organized the "Board" into several main "Lists". These cover the high-level categories of game development which are then broken down into "Cards" that detail specific features and art.

We have also leveraged the color coded card labels to help visualize our overall progress at a glance. Above you can see that the first label on each card shows the progress we have made on that specific feature. The second label on each card shows when that feature can be expected. SS1.0 means that it will be available in the first Survival Sandbox v1.0 release on Early Access. SS+ means that it will come in a later update as a feature addition. Of course, all of this is subject to change, but we want to be as transparent as possible with our current plans so that you can more easily follow along. This roadmap will always be visible directly from the navigation on the www.lacunapassagegame.com site (which is also linked in the navigation at the top of this site).

These cards should also be a great way to revisit older devlog posts that cover the more detailed development decisions that went into specific features. As you can see above, some cards have links directly to the relevant devlog posts. So instead of having to search by keyword on our blog, you can browse the entire feature list on Trello.

As of the time of this writing, there are still a few sections of incomplete cards with only titles and labels. I will be working through those remaining cards over the next week to add more descriptions, images, links, and progress checklists.

If there is anything you think I've forgotten to feature in the roadmap, please let me know! The most obvious omission is a visible release schedule or timeline. I understand that this may be frustrating considering how behind we are with the release already. I can tell you that we have a release window in mind, but we cannot discuss it at this time until more details are worked out with some third parties. Thanks for your patience.


Our attempts to feed Naga in a special chair for her megaesophagus condition...

Our attempts to feed Naga in a special chair for her megaesophagus condition...

And for those of you who remember our post back in April about our dog Naga... we have some sad news to share. We discovered that she had a skin condition called dermatomyositis in addition to a swallowing disorder called megaesophagus. Her megaesophagus became so severe that she developed aspiration pneumonia. After fighting with her pneumonia over nearly three months she began to lose strength and we made the incredibly difficult decision to let her go. Megaesophagus is not a curable condition, and while some dogs can be managed with strict dietary assistance, Naga's case was too much for her. We have been devastated by her loss. She was only six months old and we wanted to show her so much more of the world. For those of you with dogs, hold them tight ♥♥♥

Lacuna Passage - Devlog #68 - Maintenance Panels and Unity Assets

The exterior modules for Foundation Base are nearly complete.  We have spent the last few weeks touching up the maintenance panels you will find on each unit.  These panels are located on the sides of the main control unit, and open to reveal components that need to be monitored and repaired to keep the machines working properly.  Here’s a look at what a panel on the Oxygenator might look like as you approach it and when it is opened:

As you can see, there are three components inside this panel: a circuit board, pressure gauges, and fuses.  Each piece has the potential to short out or break, so you will need to craft backup pieces to replace them.  Here’s a closer look at the pieces in this panel:

Some units have more than one maintenance panel.  The heater unit, for instance, has another panel containing heating coils and carbon filters:

To repair these units, you may need to read run diagnostics or shutdown the power source beforehand.  Checking these units regularly could also prove useful if you can resolve potential issues before they become a threat.  After all, you won’t have long before you run out of oxygen, heat, or water if you leave these machines broken.

We are also working on putting up some of our assets from Lacuna Passage onto the Unity Asset Store.  Creating packages of related meshes and textures can take time, but we are hoping to pull in some additional revenue from doing so.  We only have a couple packages up right now, but we encourage you to check them out!

The next package we hope to release features a set of stairs and a raised platform used for the Habitat entryway.

Feel free to comment below!


Lacuna Passage - Devlog #67 - Inventory and Container Management

As you may know if you have followed us for a while, every month we have two development blog posts on the site. One from Spencer where he details new art that he has been working on, and one from me (Tyler) where I go over the programming/system development. This last month our progress has been a bit slower than usual. Partly due to the fact that both of us and our families all took a vacation to Nashville to unwind for a week. Unfortunately, soon after I returned we received news that our new puppy has some serious health concerns that may be lifelong.

Gratuitous sad puppy photo

Gratuitous sad puppy photo

Naga - a dachshund, basset hound, jack russell mix - will be having a skin biopsy soon to confirm if she has vasculitis, a condition that impacts her immune system and causes a lot of discomfort. Over the last couple months we have been dealing with the symptoms and trying to manage the side effects of various drugs we've used to try and treat her. Hopefully we will have more answers soon, but the many doctor's visits and close attention she requires has been stressful and has impacted my work. I wish I had more development progress to share with you today, but sometimes life just gets in the way.

All that being said, we have still managed to make some very important progress with our inventory management system. I thought it might be kind of fun to do a more informal development video covering these features where Spencer and I discuss some of our design process. As with everything else in these blogs, nothing is final, but the discussion featured in the video might give you some insight into the kinds of conversations we often have when trying to shape how the game will function. Sometimes we don't always agree on how something should work.

Progress has been made in a few other areas including terrain tile loading and game state saving, but unfortunately none of those aspects are very visual so they don't make for very interesting blog posts. Let us know what you think about the inventory UI in the comments.

Lacuna Passage - Devlog #66 - Exterior Modules and Maintenance Panels

We have nearly finished all the exterior modules for Foundation Base.  Here’s a quick look at the final designs for the three main units - The heater, water reclaimer, and oxygenator:

Each of these units are color coded with reflective and vibrant paint colors that will help you distinguish them from a distance.  This was important that we use textures for this purpose, because creating unique silhouettes would be expensive not only in development time, but also in polygons.  Obviously the machines each have their own style, but mostly we are just swapping out the diffuse textures to change the colors since all three units are utilizing the same normal, specular, and gloss textures.

As you can see, we have added a control hub to the front of each module.  This is where you will normally approach the machines, and interact with the control panel.

From here you will be able to perform diagnostic checks from your datapad.  You will also be able to download documentation about possible repair procedures.  Sometimes you will be required to shut off the power to the machine prior to doing these repairs, so you may have to perform your work fast before the Habitat loses too much heat or oxygen.

Most repairs will direct you to a particular maintenance panel.  These panels vary depending on the machine, but they are always located to the side of the control hub, designated by letters.  For example, if you run a diagnostic that returns a particular electrical error code, your downloaded instructions may direct you to then shut off the power source and replace a fuse in maintenance panel A.  When you approach the maintenance panel, here’s a peek at what it might look like:

When you open the panel you will be presented with multiple components, each corresponding to different types of repairs.  You will need the correct pieces of equipment to perform the repairs.  For this example you would notice that one of the fuses is burnt out in the bottom left portion of the panel, so you would need to remove that fuse and replace it with one from your inventory.

Obviously the texturing for these internal components is not complete, but you get the idea.  There will be many different pieces and repairs required for these units, but after some practice you may start to learn the quickest ways to fix them.  Or better yet, you may be smart enough to run diagnostic checks regularly to repair possible issues before they ever occur.

Feel free to comment below!